ART 484 - Creating Bitmap Textures in Photoshop.
Page 3
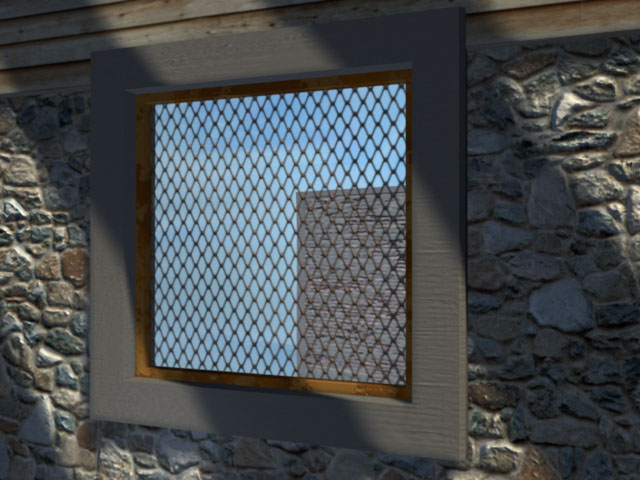
When making bitmap textures, transparency maps can also be created. These can make areas appear totally transparent or semi transparent. For the following example of creating a grate to cover a hole, it was not possible to find an suitable image of a grate, so one was modeled in Maya. This took some extra time, but much of the work was done with the Maya renders, so there was little work to do in Photoshop.
Why not just use the model of the grate in the scene? Using an image of the grate with a transparency map for the openings renders much faster. File sizes are smaller. If the camera was very close to the grate or if lighting was moving across the grate, then using real geometry for the grate would look better.
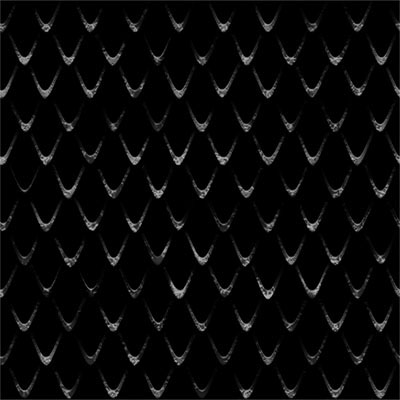
Grate
 |
Color Image Image rendered out from an Ortho Camera (Window) in Maya. It was then brought into Photoshop and cropped to make it seamlessly tile. The file for creating this image is in my pub space on vart, if you want to look at it. |
|
Transparency Map Without moving the camera or model, a simple alpha channel was rendered out. Where the transparency map is white will be transparent. |
 |
Bump Map A ramp shader going from black to white was put on each strand of the grate. This will give the same appearance as the wood siding, where each strand appears to be overlaying the lower one. |
 |
The Specular Map was created in Photoshop and is a blend of the bump map with a high-contrast b&w copy of the color map. |

Finished Render in Maya using all four maps

Page 3