Negative and Shadow Lights
This page is designed as a supplement to lectures. It is not intended to be a stand alone tutorial.
In the virtual world a compute can handle a negative number as well as it can a positive number. Thus it is possible to create Negative Lights - lights that subtract light from a scene. These can be useful for certain effects or problems. If used correctly, they can quickly create darker areas, strengthen shadows. Many times the hit on rendering time is minimal and saves the animator from longer more elaborate workarounds.
Negative Light
Here is a table with a low angle light coming in and creating a shadow. In reality there would probably be a darker area directly under the table. This could be done with Final Gather, Ambient Occlusion, or other elaborate solutions. These might be better, but occasionally itis just as good to put a negative light under the table and give the impression that there is a shadow there. |
 |
Create a Point Light and position it directly under the table. Start off with its Intensity set to -1. You may need to add in decay or turn off If your modeling window is set to display light effects, you can begin to see the effect - as in this screen grab. Its already darker under the table. |
 |
Keep adjusting the intensity until you get the density that you need. You can also color negative lights in the same manner as positive lights. In this case, just for the demo, the shadow was made a bit redder. |
 |
Shadow Light
A very cool effect can be to combine a positive light with a negative light. The positive light is casting a shadow, but the negative light is not. Thus, the negative light subtracts exactly the same amount of light that the positive light is creating, but the shadow is still there. The effect being that a shadow is created without any indication of a light source. This effect is usually used to strengthen shadows in certain areas. It can also be used to increase the resolution of a shadow in a part of the scene will the camera will be trucking into.
This effect can be very useful to casting a shadow in a scene where the lighting is already perfect - all you want is some shadows in a certain area.
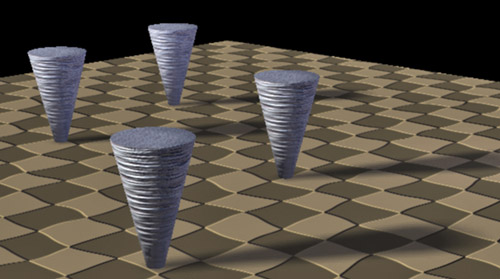
In this scene there are 4 cones all with the same soft shadow. For the demo we will make the shadow of the cone furthest to the right deeper. The scene currently has a directional light that is casting the shadow. There is an weak ambient light filling in the scene. |
 |
Create a Spot Light that is at the exact same angle as the directional light. Aim it so it is only hitting the cone we want to work with. Turn on depth map shadow and work until you have the shadow as you like it - sharper, softer, etc. Then, just duplicate the light. Don't move it! Turn its intensity to exactly the negative of the first one. For example if the first light (the positive one) is at 1.2 intensity, change the second light (the negative one) to -1.2. Then turn off the shadow for the second (negative light). |
 |
When you render, the shadow should now be stronger - as demonstrated here.
For a real example of using a shadow light, see the tutorial on Interior Indirect Lighting. |
 |
UMBC Department of Visual Arts, Advanced Maya Courses, Dan Bailey