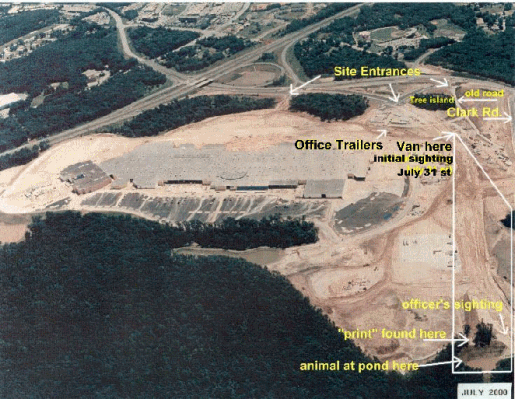
Figure 2 - Aerial view showing key features in the Arundel Mills incident