UV Mapping a Suitcase
This page is designed as a supplement to lectures. It is not intended to be a stand alone tutorial.
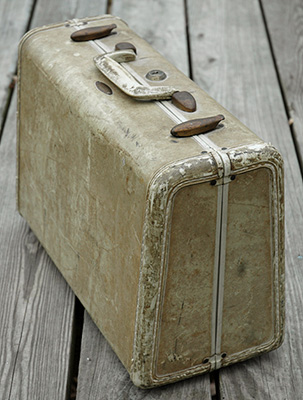 |
The task is to recreate this old suitcase. It needs some detail, but will not have a close-up, so many short-cuts can be taken in modeling and texturing. Its simple shape makes it appropriate for a good basic tutorial on UV mapping of a polygonal model.
|

The first step was to photograph all sides of the suitcase to be used as textures and for modeling information. Again, a simple Image Morgue was created for it.
UV Mapping: Creating the Textures
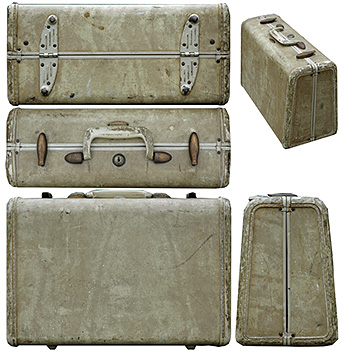 |
A model sheet is created. All views are lined up and the same size. This can be imported into Maya to be used as an image plane for modeling. |
 |
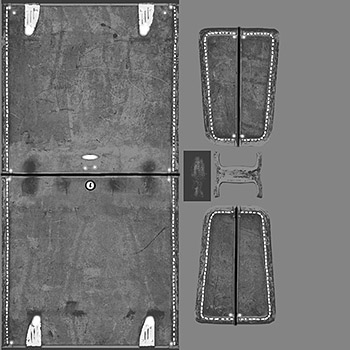
A color map is created for texturing. The suitcase was "unwrapped" around its middle, with the seam being located on the bottom of the suitcase. The two ends will be mapped on separately. The handle and clasps will also be textured separately Separate photographs of sides, top, bottom, and edges were manipulated and layered in Photoshop to create a seamless image. The seams between the middle and the two ends will be hidden by the natural seam of the suitcase. When creating texture maps, try to keep the size of different images relative to each other. It doesn't not look good to have a small detail render with higher resolution than the larger object. In this example, it is tempting to enlarge the size of the ends, handle, and clasp, but then they would not match the resolution of the overall suitcase. |
 |
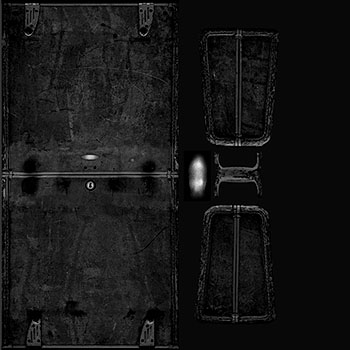
This is a bump map made from the color. The stitches, metal plates, and rivets are painted white so that they stand up. The joint between the two halves of the suitcase are painted black, so they they will appear to indented. |
 |
This is a specular map made from the color map.
This tutorial is following the pipeline of making an object for a video game, where all the textures are on one image. The file is a "power-of-2", (512x512, 256x256, etc).There is wasted space in this particular texture. In a video game, textures space is very valuable and all available pixels are used. |
Modeling
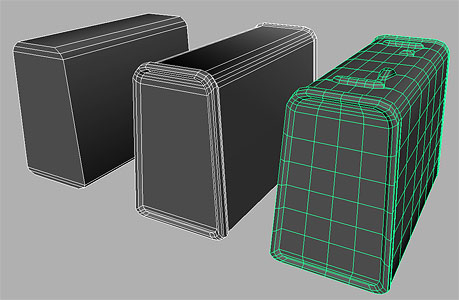
This tutorial will not cover the modeling of the suitcase. The shape is simple and block-modeling was an efficient method for building the suitcase. The surface has enough detail to distress (warp) the suitcase once the textures are on, to give the suitcase a more organic, old, or worn appearance. The completed scene file plus the textures are available in my pub space on vart.
UV Mapping: Projecting
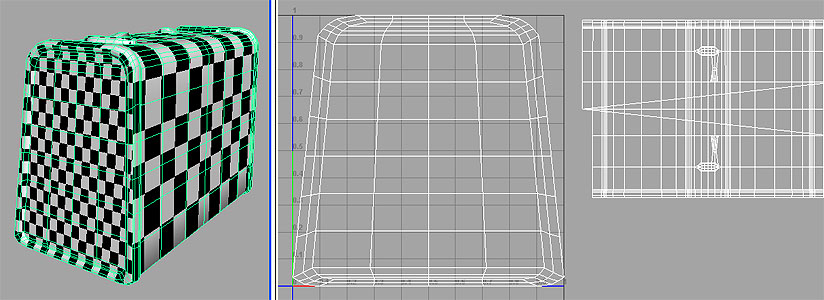
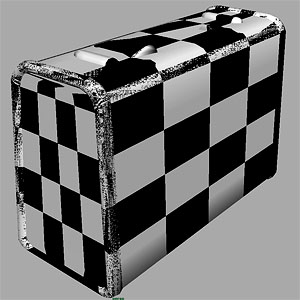
A checker texture is a very efficient method for checking UV mapping to see if there is stretching, overlap, or incorrect scaling effects. Here, the texture is applied to the suitcase before any mapping has been done. Sizes are incorrect, the edges are wrong, and the top has weird stretching and diagonal patterns. To accurately see your textures in the hardware view, it can be helpful to open up Shading>Hardware Texturing>Options and change the Filter to "unfiltered." |
 |
Opening up the texture in the UV editor, shows how the texture is currently being mapped. The large flat surfaces are laid out evenly - hence they look good in the above render, but all the others are overlapped or scaled to zero. The UV editor is laid out from -1 to +1 in both the U and V directions. All activity should ultimately take place in the 0 to +1 space, which is in the upper right quadrant. As you are working, you can move shells of UVs out of the way, but eventually they need to be brought back into the quadrant. |
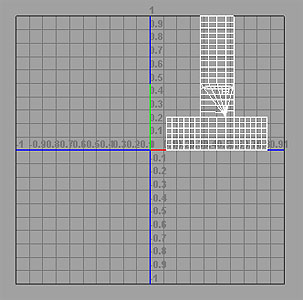 |
 |
Automatic Mapping can be a very quick way of working. It creates 6 planar projections around the object and selects which projection is the most appropriate for each polygon. Or at least it tries. It also arranges the UV shells in a logical order in the UV space. Here you can see that it has pulled out all 6 sides of the suitcase, plus all the ribbing. The Checker Texture shows that it has done a pretty good job. A drawback to Automatic Mapping is that it tends to create ALOT of shells and you might need to do ALOT of rearranging and stitching to make order of it. In this case, all the little separate ribbing parts would have to be dealt with. |
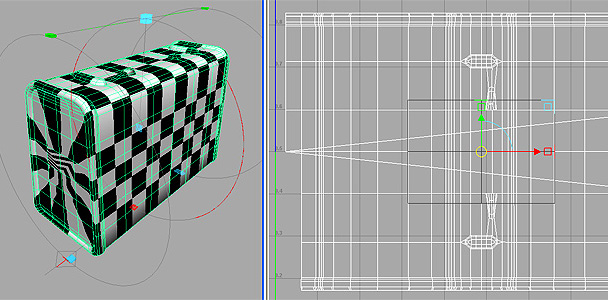 |
We could easily use the Automatic Mapping for the suitcase, but for this tutorial, we will use a Cylindrical Projection for the main part of the suitcase. It is scaled to cover the entire object and orientated so that the seam is at the bottom. This will match how the texture will be wrapped on. The manipulators are helpful to use, but for accuracy, typing in vales in the Channel Box are much better. The UVs are laying out fairly correctly. One drawback to this method is that the UVs are not evenly space over the flat areas. This creates different size squares . This, however, can be easily correctly by adjusting the UVs to be evenly spaced. |
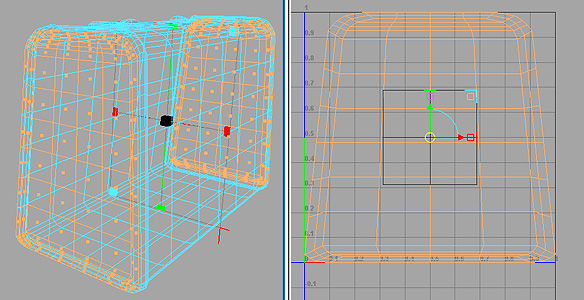 |
The next step is to select just the faces on both ends of the suitcase. Decide where it is best to make the seam between the two projections.
A Planar Projection was then applied to just these faces. Note that the two end shells are on top of each other, because you projected them at the same time. At some point you will need to separate them. |
By default, the planar projection fills the entire UV space. Thus, on the model, you can see that the checker board is much smaller on the ends than on the middle.
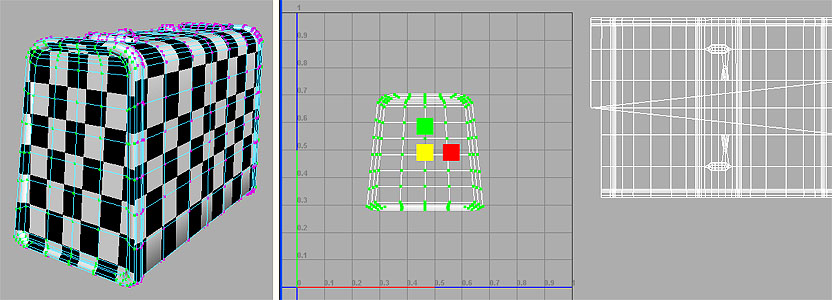
In this example, the UV shell of the suitcase end has been scaled down and now the checkerboard is the same size.
The last projections to create are for the two clasps and the metal hinges that hold the handle to the suitcase. Select just the faces for each item and apply a projection. One suggestion is to just use a Planar Projection on the Y axis and then use the "Relax" tool to have the UVs stretch out to cover the same amount of area. Everything is now mapped. There should be 7 separate shells in the UV Editor: Middle, 2 ends, 2 clasps, and 2 handle hinges. |
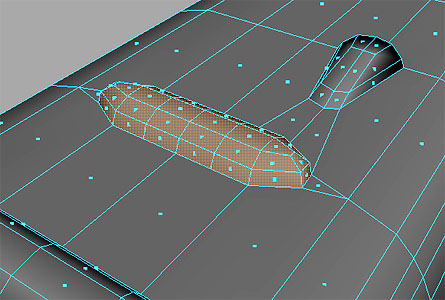 |
UV Mapping: Aligning, Moving, and Stitching UVs
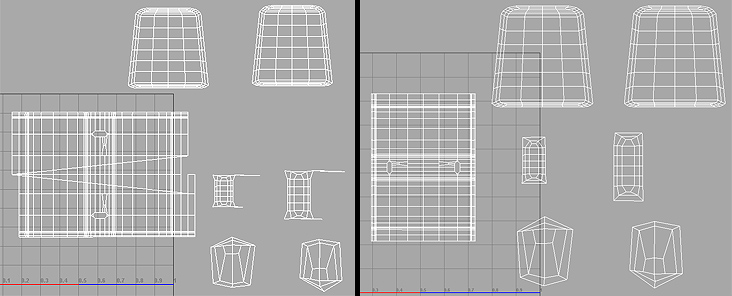
The left image is how the UVs looked after projecting. The middle part of the suitcase did not break cleanly on the bottom of the suitcase. There are also some UVs that are dramatically in the wrong places. You can see this by the diagonal lines on the middle section. Also, the maps for the two clasps have a UV sitting way off to the right.
Slowly work on each shell to clean them up. The hardest is the middle. You will have to separate some UVs from one side of the seam, move them over to the other, and stitch them back on. You will also have to locate and possibly split or cut the UVs that are creating the diagonal line. They need to be moved back to the other side. When finished, the aligned maps should look something like the image on the right. Note that the middle part of the suitcase was rotated 90 degrees as it was cleaned.
An artifact of the Cylindrical Projection is that the UVs are not evenly spaced. The checkerboard texture illustrates this. The grid is stretched vertically at the top and bottom of the sides, and it is compressed in the center. This stretching would be noticeable when the color map is placed on the model. |
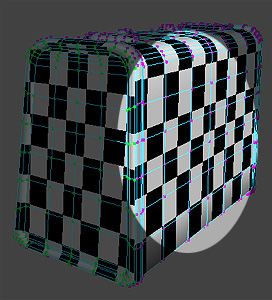 |
By selecting a row of UVs and moving them up and down, you can even out the spacing. Play with this to really begin to understand the relationship for the UV maps to the image and how it appears on the model. When everything is looking clean and even across the entire model, you can now bring in the final color map texture of the suitcase itself. |
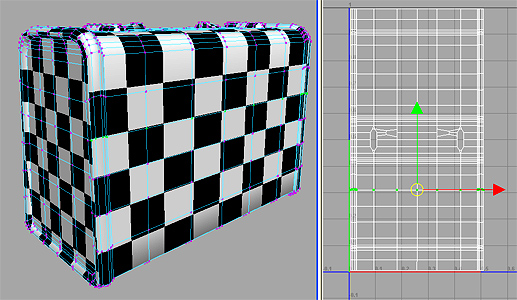 |
Create a shader with the color, bump and specular maps. Apply it to the model of the suitcase. It will now show up in the UV editor. Align and scale the UV shells to the color map. Pay strict attention to how the seam between the middle and ends of the suitcase will look. Note that the 4 maps of the clasps and hinges are on top of each other over the metal image. Keep checking the Hardware shaded view and also doing quick renders to check alignment. You may need to individually move some UVs to that parts of the model line up perfectly with the textures. |
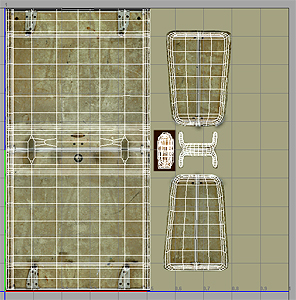 |
Finishing Up
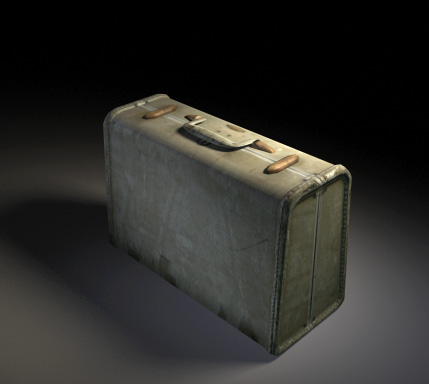 |
Model a handle using the model sheet as a guide. Figure out how you want to project a UV map onto it (planar? cylindrical?). Note that the texture for the handle already exists on the color map, so you will need to unwrap the UVs so that they match the texture. Apply the texture and position the handle on the suitcase. |
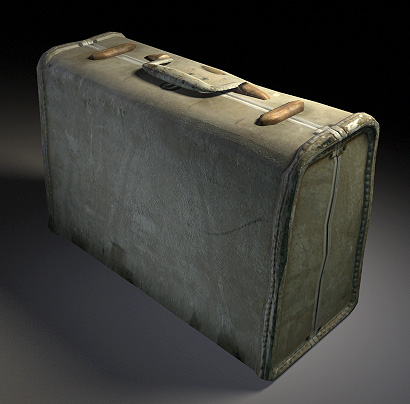 |
At this point you can distort the suitcase. The textures will move with the model. This allows you to bang in one corner of the suitcase and the image of the stitching will follow. |
UMBC Department of Visual Arts, Advanced Maya Courses, Dan Bailey
