This page is designed as a supplement to lectures. It is not intended to be a stand alone tutorial.
Model Sheet
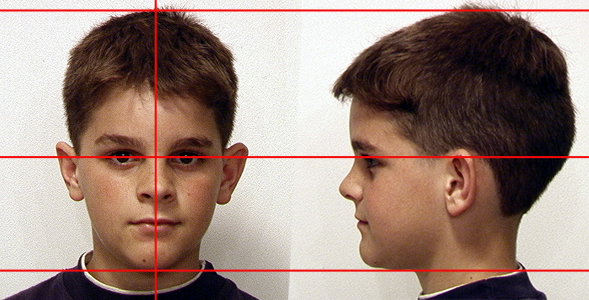
There are a number of methods of bringing in images to model from. In this example, we are using two images that are applied to the orthographic camera's image planes. It is important and helpful to have the image the same size and centered in Photoshop before exporting them. The two images are applied to the front and side cameras (respectively) and thus do not show up in the perspective window. This can, at times, speed up work flows.

Model Methods
There are many ways of setting up and modeling a head. In this example, we will loft a surface from precisely constructed curves that has one opening at the mouth and the other opening at the neck. We will use a number of techniques to arrive at the final group of curves that will loft the finished head surface. While the working surfaces generated wll be NURBS, the final surface can be either nurbs or polys.
To begin, we will start with the mouth because that is fairly easy to understand and visualize. This section will be created by working with curves that follow the mouth line. When the area of the mouth from the nose to chin is complete, we will switch directions and model the remainder of the head with curves that follow the side view of the head. This also seems to be easier to visualize and understand.
Model the Mouth
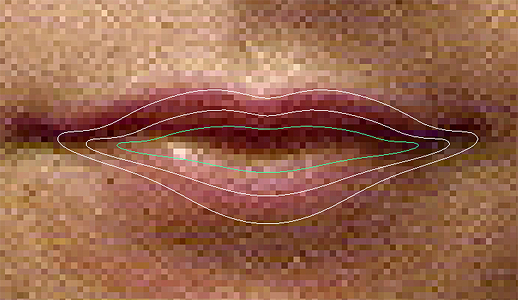
Draw a curve that matches the lips from the front view. Take care to place the CVs precisely and symmetrically. Remember that the placement of the CVs will control the generation of the lofted surface. "Close" the curve when you are finished. Wrangle the CVs until you are happy with them, but again keep them symmetrical.
[Note: It would be possible to draw just 1/2 of the curve and then duplicate it to form the other half. In this way, the curve would be completely symmetrical.] |
 |
| Do NOT DRAW a second curve. To assure that you always have the same number of CVs, duplicate the first curve. Scale and transform this curve to begin to define the lips. Keep switching from front to side views to check your progress. Repeat this process for a third curve. | 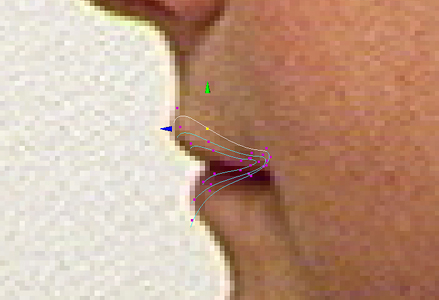 |
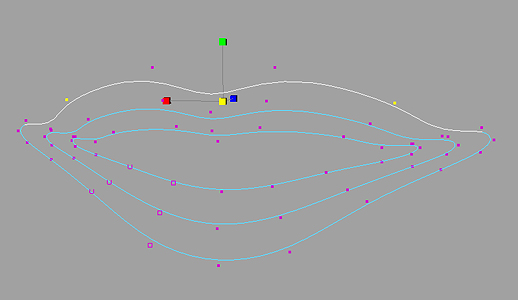 |
This perspective view shows how all the curves match at their start points and directions. The CVs are aligning well to create a lofted surface. Note that in this example two symmetrical CVs have been selected and are being adjusted symmetrically by using the scale function. |
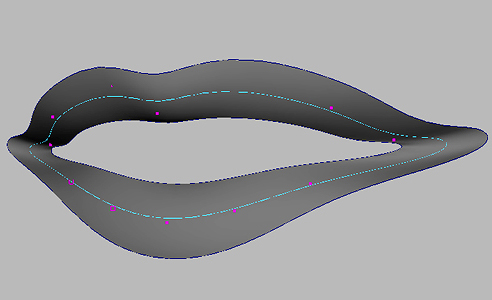 |
Loft a surface from the 3 curves so that you can visualize how the mouth is looking. However, do not work on the surface. Continue to select curves and the CVs on the curves to model the shape. |
 |
The lofted surface is only used to visualize. As you duplicate and add in more curves, keep deleting the old lofted surface and creating a new one that contains the new curves. In this example, there are now 5 curves generating the lips. |

Continue with this method until you have the region from the chin to the mouth completed. Remember that it is the curves that you will be working with. The surface is only for visualizing. At this point you could continue in this manner, but it becomes very difficult to model curves in this direction to define the nose, chin, eyes, etc. Instead we will quickly generate some rough curves for the remainder of the head, and then use them to generate curves going in the other direction for adding in detail.
Roughing in the Rest of the Head
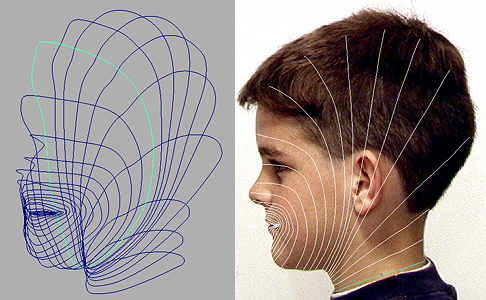
Continue duplicating the mouth curves, but do not worry about fine detail. Work the curves to match the front and side views to create a rough volume and form for the head. Notice that there will be many curves close together under the chin as the curves rotate to shape the head. In this example, we do not need a lot of detail for the back of the head, so the curves can be positioned far apart.

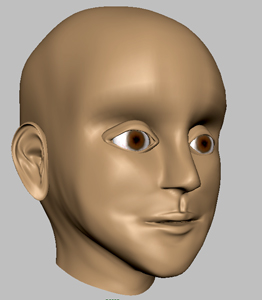
Loft a surface for the entire head at this point. Select the surface's isoparms going in the other direction for 1/2 of the head (middle image above). Duplicate these isoparms into curves. These new curves will be used to model the detail for the rest of the head. These curves contain all the detailed information for the mouth, but they now allow us to easily visualize and form the remainder of the head. Hide all the original curves, delete the surfaces, so that just the new curves remain (see right image above). Clean up and organize your outliner. Save the file.
Mirrored Instance for Symmetrical Modeling
| Loft a new surface from these new curves. You can now select the surface and make a mirrored instance of it. | 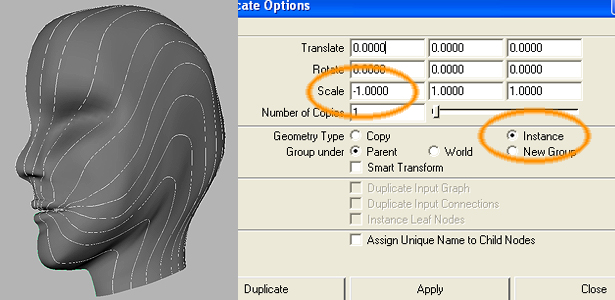 |
Using a mirrored instance allows you to model one half of the head, but the other side updates automatically. Many times it is easier to model when you can see the whole object. Mirrored instances are used many times. The image on the far right shows how the head warps out symmetrically when a CV is moved on just one side. |
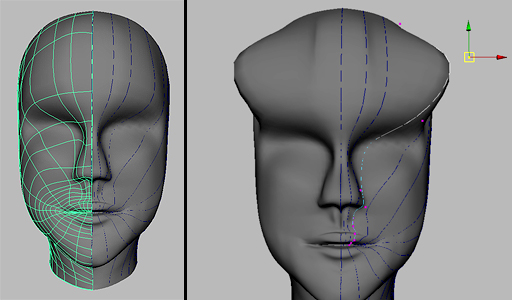 |
As always, do not model the surface(s). Continue work with just the new curves until you have the head as you want it.
Final Loft of the Complete Head
When the head is as you want it, delete all surfaces. Duplicate and mirror the curves to form the other side of the head. You can now do the final loft. It is recommended to have the seam go down the chin. |
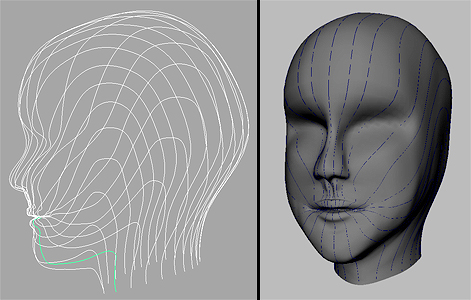 |
| Applying a Phong or Blinn Shader to the head gives you highlights. If you smooth it with the sculpt tool, make the strokes "reflected" so the head remains symmetrical. | 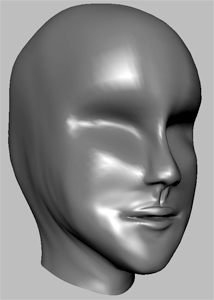 |
Modeling the Ear

In this simple example, the ear is modeled separately and placed on the surface. It is not joined to the head. The ear can be easily modeled by creating a number of cross-section curves (with same number of CVs) and lofting through them. One the loft is make, continue working with the curves to make the folds of the ear. Duplicate and mirror the eye and position both of them correctly on the head.
Modeling the Eye
The following example shows modeling a simple NURBS eye that is placed on the surface of the head.
Eyes can be constructed simply or realistically complex. Most methods begin by drawing or projecting a curve on the head surface that will form the eyelid. The surface can then be trimmed and new surfaces pulled out from the curve to create the eye. In this tutorial, a simple eyelid will be constructed separately and positioned on the head. The eye will not be cut out from the surface |
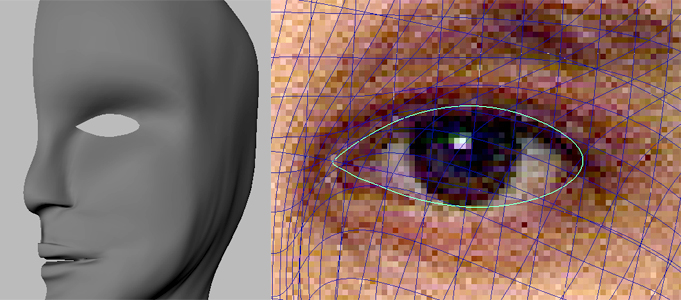 |
| Duplicate the eye curve on the surface and use it as a path to extrude a profile curve of the eyelid. | 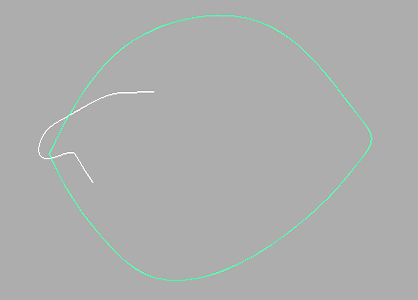 |
| Use CV selection, pick-walking, and the sculpt tool to adjust the surface create the upper and lower eyelid. | 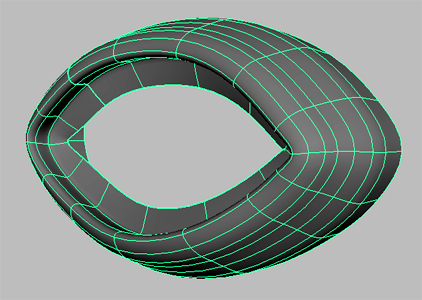 |
| At some point, create a sphere, rotate so its pole is the iris. Scale it until it fits into the eyelid and looks natural. Continue to tweak the eyelid until the folds of skin cradle the eye ball. | 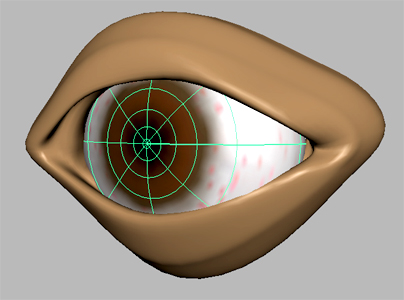 |
| Mirror and duplicate the eye. Position both eyes. | 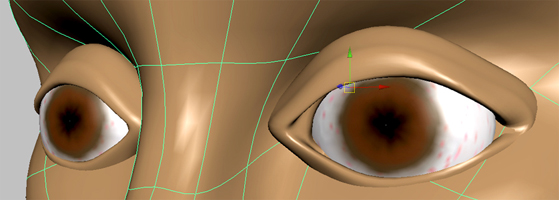 |
