ART 484 - Creating a Digital Image Morgue
This page is designed as a supplement to lectures. It is not intended to be a stand alone tutorial.
This method uses Photoshop's built in ability to make web sites of images. You are welcome to use other automated systems as well. For example, iPhoto. The important factor is that you should have the ability to quickly search a large pool of photographs (thumbnails are very helpful for this), plus have the ability to find the high-res image to work from should you need it.
Preparing Files
Basically you don't have to do much. Your original files can be in any format that Photoshop can read and they can be any size. Just remove the images that you don't want; adjust any images that are too dark, etc; and make sure that the image is orientated correctly. Photoshop will re-size all images when it creates the web-site.
If you want to, you can use Photoshop's File>File Info to add in comments about the image under "Description" These can be added to the web site if you toggle it on in settings.
Organizing and Naming Files
Decide how you want to organize your files. Use one or a combination of two methods:
- Name files in a directory so they appear in a clear order. For example: grass1, grass2, grass3, tree1, tree2, tree3
- Create separate directories to organize images. For example: vegetation, environments, wood, etc.
If you create different directories to organize images, you will need to run the automated web photo gallery feature separately for each directory to keep them separate. This will give you 3 separate web indexes. You will have to manually create a master index page that lists/links to all the separate image indexes.
Web Page Creation
Once your files are ready, open Photoshop.
File>Automate>Web Photo Gallery
- Select a style that you like. I use "Simple- Thumbnail Table" it is very fast to navigate
- Select the Folder where the original images are
- Select whether you have Sub-Folders in the main directory
- Select a Destination Folder where the web page will be created
- Options (there are a lot of these, go through them carefully)
- General. Pretty simple, leave the default
- Banner. This is where you will title your pages
- Large Images. This is important. Select what size you want your master images to be. What type of file format. You can also select whether you want the Descriptions you have added to an image under File>File Info.
- Thumbnails. This creates the size of the thumbnails on the index page.
- Custom Colors
- Security
- When ready, click "OK". The web site automatically loads in a web-browser. Check how it looks. Also, go to the destination folder and see how Photoshop built and organized the web-site

Web-site
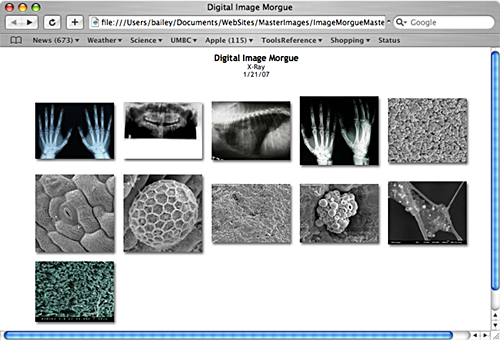
Here is how "Simple-Thumbnail Table" should look. This style allows you to quickly see a number of images, and then click on to see a high-quality master image.
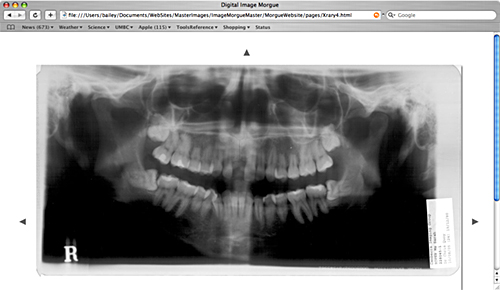
Clicking on the X-ray image of a mouth, takes you to full image. From there you have arrows to move forward, backward, or back to the index page (up arrow).
Organization
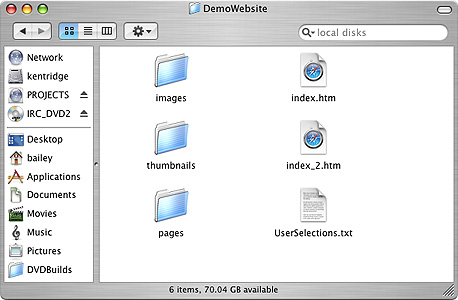
Here is how Photoshop creates the files and folders for the website. If you move them, you need to move the whole group. If you are making a number of web galleries, you would make an overall index that links to each "index1.html" of each folder.