ART 484 - Walking with Grace, IK Skeleton Setup
This page is designed as a supplement to lectures. It is not intended to be a stand alone tutorial.
Proportions
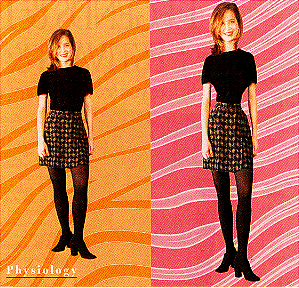
Usually a skeleton is created to match an existing model. In this case, we are just creating a skeleton for testing animated walks. If you want a human biped figure to walk naturally, its important to get proportions correct. In the following examples, it is easy to see how age, growth and exaggeration of a figure effects the proportions of a body.
|
This diagram shows how a normal young woman would look if scaled to match the proportions of a Barbie Doll. |
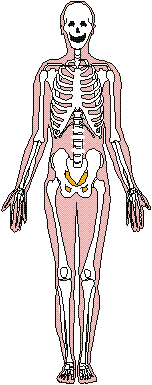
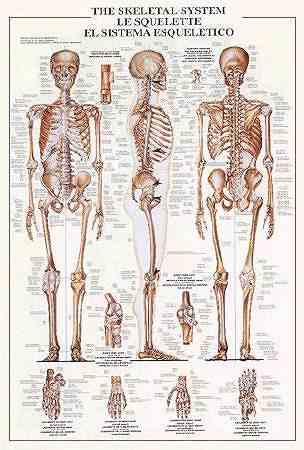
For this exercise, we can use typical human skeleton diagrams as a template.
 |
 |
Building the Skeleton
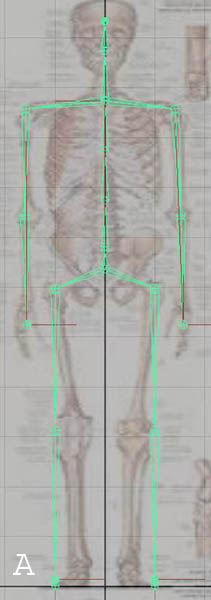
1) The skeleton diagram above left is available on bailey's pub space: pub/bailey/maya/projects/classdemos/sourceimage/skeleton2.jpg. You can bring it into your own scene and map it to a plane. Scale it so that the skeleton is 12 units tall. Having a scale that you know (1 maya unit = 6 inches) makes it easier to build an environment for your character and have it move accurately.
2) Begin to create the leg of the character. Use snap to grid so that the pelvis joint is directly on the Y axis. This makes it easy to mirror and duplicate joints later on. Make sure that you have a slight angle at the knee so the IK chain will bend the knee in the right direction. Remember to position the joints by using the translate pivot or translate tools. When the leg is correct, clean the chain by selecting Skeleton>Orient Joint.
3) Duplicate or Mirror the joint to create the other leg. Check that things are symmetrical and correct. Name the the nodes with labels that are understandable: Pelvis, L_Hip, R_Hip, L_Knee, L_Ankle, etc.
4) Add joints going up the spine through the chest, head, and ending with the "nose". To add joints to a chain, select the joint tool and then click on the joint that you want to add to. The first joint, directly above the pelvis,. should be small. Remember that you can't attach an IK chain to the root node - everything will flop around if you do. Make sure that the spine has a curve to it so that the IK chain knows how to bend. Label the joints when you are done.
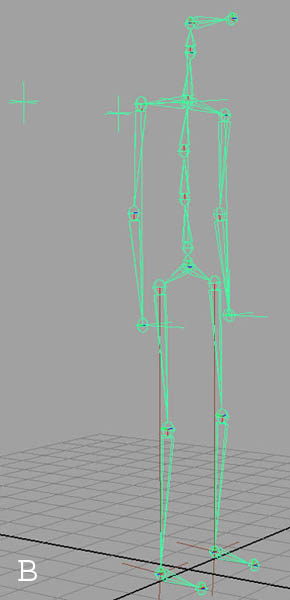
5) Add the left and right shoulders and arms. Again, make sure that you have a slight angle at the elbow. Remember to orient joints and label them correctly. When finished you should have something like the following with all nodes named correctly and all appearing under the root node, which could be called "pelvis"
Front View with X-Ray shading so you can see the grid through the image plane |
Finished and rigged Skeleton |
Completed Skeleton in Perspective View with the Image Plane. |
Add IK Handles
1) Add SC IK chains to Both Legs (from hips to ankles). Label these something like Lfoot_IK and Rfoot_IK.
2) Add an SC IK chain up the spine to the chest. Be sure not to select the root or pelvis node. Select the spine joint just above it. Label this IK Handle something descriptive.
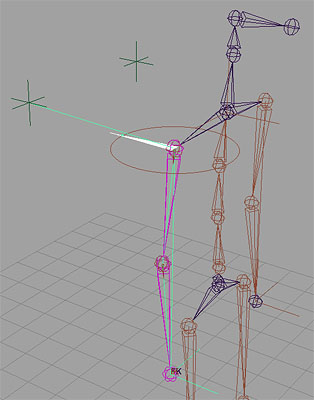
3) Add RP IK chains to each arm (from shoulder to wrist). Label them correctly.
Create two locators and move them to just behind the shoulders. Attach a Pole Constraint from each IK Handle to the locator. Now the elbows will bend and move in the direction of the locators. |
 |
Parenting and Grouping
The IK handles and locators need to be parented into the hierarchy so that the skeleton moves correctly.
1) The Spine IK handle needs to be parented under the pelvis node. In this way the IK handle will move as the pelvis node moves.
2) The 2 arm IK handles need to be parented under the chest node. In this way they will move as the chest and shoulders move.
3) The Locators for the RP IK handles also need to be grouped under the chest node.
4) The feet IK handles should stay separate from the whole pelvis hierarchy. They move independently from the body - actually the body moves in relation to where the fit are on the ground. BUT, it is helpful to have a "Master Node" that the pelvis and feet IKs are in. This allows you move, rotate, and scale the entire figure.
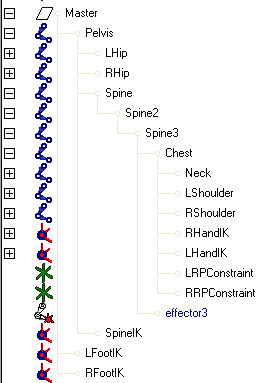 |
Here is the outline for a correctly setup skeleton (for this exercise). To make the outliner smaller so that you can read it on one page, the arm, legs, and head nodes have been collapsed. If you follow the parenting lines, you can see how many things are parented under the "chest" node. |
Animating the Walk
There are many methods to animate a character walking. In this assignment, we will not be working in a pose to pose method, but will be using a method that slowly refines the animation by adding in more and more elements over the entire sequence. This method of animation is important to understand for all type of animations. It depends on animating one parameter at a time and not setting excessive keyframes that ultimately make it difficult to control a movement. The method also encourages animating the larger overall movements first and then matching the smaller or nuanced movements in later passes. All setting of keyframes is done manually using the right mouse button to set a frame for one channel at a time
To get realistic movement, at some point, an animator has to get some realistic data of walking to work with. If you make it up and improvise, you can quickly get something that is not the tempo or posture that you want. Getting accurate data can be done in a variety of ways: careful observation, measurements, rotoscoping, or motion capture. In this exercise, we will work with the scale of the character. Assuming that your character is 5 - 6 feet tall you can determine how many "Maya Units" makes for 5 or 6 feet. The grid in Maya represents one unit. Using this scale you can measure how far your character would move by taking 5 steps and time how long it takes. For example, a 6 foot character taking 5 regular steps could move about 9-10 feet forward in approximately 5-6 seconds.
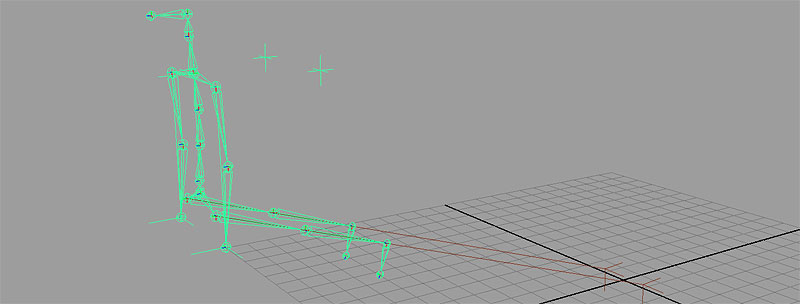
1) Set the overall translation of the pelvis for the entire sequence. Establish how far the character must move to cover 5 steps and how long it takes. To allow for animation before the first step, do not have the character move before 30-60 frames. At that point, only set 2 keyframes for the translation of the pelvis: one at the beginning of the first step, when the pelvis starts to move forward, and the other at the end of the 5 steps when the pelvis stops moving. Don't worry about the feet, they will stay at the start point and it will look weird. Work with the type of tangents of these two keyframes so that the pelvis eases in and out of the movement.
2) This is perhaps the hardest part and many times has to be redone. Set only the horizontal translation (not Y) for the foot IK handles. This process will be setting how long each step is and how quickly they happen. In this example, most steps are approximately 1 second in length. As you move the time slider, watch the pelvis and keep it centered between the two feet. You should use "clamped" tangents for the keyframes. This will keep the feet from sliding through the floor. When one foot is keyed to set on the floor, the other foot should be keyed to lift off the floor. This saves time in animating. When finished, your figure will have stretched knees and the feet will look like they are "shuffling".
| 3) When your steps are close to the right timing and spacing, go in and set keyframes on the Y translation. When the foot is on the floor, make sure that your Y translation is on the floor. 2/3s of the way through a step is the highest raising of the foot. Set a keyframe on Y to raise the foot above the floor. The knees may still be stretching and popping at this point. For this exercise we will leave the feet at this point. Obviously much should be done to get accurate movement. In this simple setup, you could animate the rotation of the ankle joint to have the foot bend more realistically. | 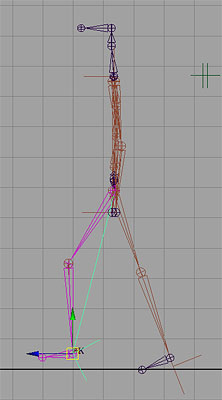 |
| 4) As a person walks, their pelvis moves up and down, and it swivels back and forth with each step. Add in a small amount of movement on the Y axis so that when the legs are spread apart, the pelvis is a little lower. Also, add in some rotation so that the pelvis rotates with the legs. Doing these two steps will usually fix most problems with stretching and popping knees. | 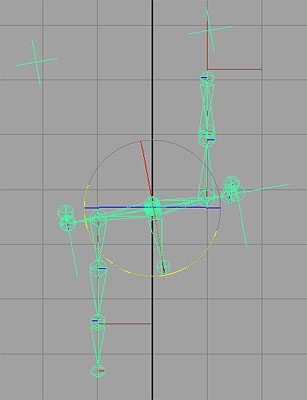 |
| 5) We will now move up to the "chest" node. Currently, the chest is rotating with the pelvis. This makes for a stiff looking upper body. We need to rotate the chest so that is swivels in the opposite direction as the pelvis. Remember that a character's arms move in OPPOSITE directions as the legs. | 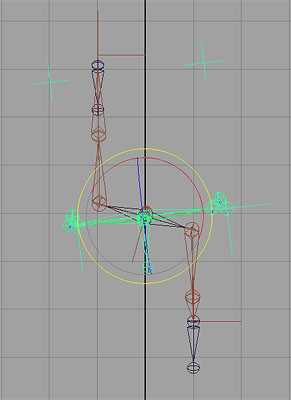 |
6) Next we will animate the spine IK handle so the character leans forward a little and possible moves up and down during the walk.
7) The last major step of this exercise is to animate the hand IK handles so that the arms swing naturally in rhythm with the walk.
8) Last touches can include animating the neck and head, the arm pole constraints (so the elbows move), the ankles, etc.
 This
diagram shows how proportions change as a human grows