Exterior Direct Lighting
This page is designed as a supplement to lectures. It is not intended to be a stand alone tutorial.
Lighting large areas and matching real world outdoor lighting can be difficult. Viewers are very familiar with how the sun creates a certain type of shadow and also how the sky fills in these shadows. Matching these expectations or matching CG elements to existing photographs takes effort and time.
Direct light methods, where an animator uses lights or arrays of lights, can get close to matching photo-realistic lighting, but its real upside is in how fast it can render.
Remember:
- Depthmap shadows render much quicker, but need huge resolution to cover large areas. Many times breaking out the background and horizon from the foreground and lighting or rendering them separately can be helpful
- Directional lights create Depthmap shadows for the entire scene. Though directional lights render quickly, large ground planes KILL directional light depth map shadows.
- Spotlights only create the depthmap for the area it covers. This speeds up render time and quality, but the lights are harder to use to cover a whole terrain.
- A typical technique is to warm up the light of the sun and cool down the lights that are creating the fill.
This is our basic scene. The buildings and landscape are not textured for this demo in order for us to focus on the lighting effects. Also, the renders are much quicker. This is a good way to quickly block out lighting before you bring in large amounts of textures, bump maps, specular renderings, transparencies, reflections, etc. The shot has just a Sun or Key directional light coming in low and from the left - as if it is morning. Raytrace shadows have been used for this light for accuracy and sharpness. This will be the only light in this demo that uses raytraced shadows. This demo also only uses the Mental Ray renderer This render took 3 seconds. |
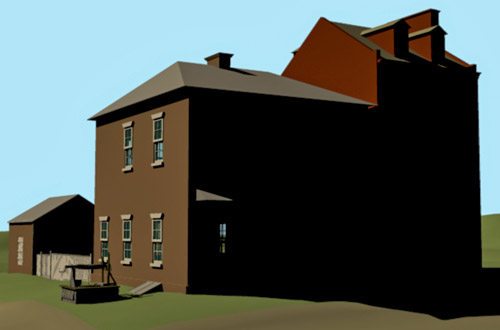 |
The typical "knee-jerk" reaction to use an ambient light as fill is horrible. There is no sense of shadow, modeling, or relief in the shadow areas. Be very careful in using ambient lights. They are fast, but rarely give the quality results you want - especially in photo realistic renders This render took 4 seconds |
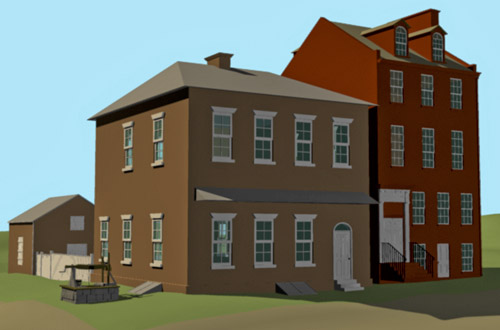 |
This is using just 1 directional light for fill. It is positioned to come in directly opposite from the sun. It is tinted blue and is using depthmap shadows. Because the ground plane is so large in this scene, the depthmap resolution needs to be turned up very high, as well as the softness. You can see artifacts from the low resolution, but you can also begin to see that the shadow side of the buildings have relief and shadowing of their own. The next step is to refine this look. This render took 5 seconds. |
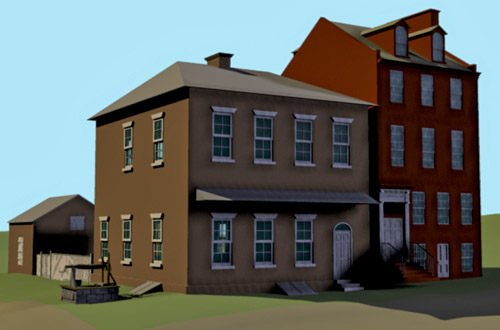 |
This is a typical technique for stacking up directional lights to create a soft fill. # 1 is the Key or Sun light with an intensity of 1. #2 is a group of directional lights, each with a low intensity and their angle is varying by 5-10 degrees. In this example there are 7 directional lights. Each has soft depthmap shadows and are tinted blue. |
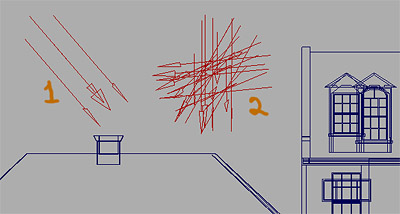 |
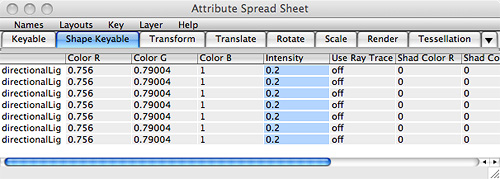
A trick for adjusting parameters on large groups of individual objects or lights is to use the Attribute Spread Sheet. Windows>General Editors>Attribute Spread Sheet. You can individual change aspects, or highlight a whole column to change. In this example, we are quickly changing the intensity of all the directional fill lights to try a different setting. |
 |
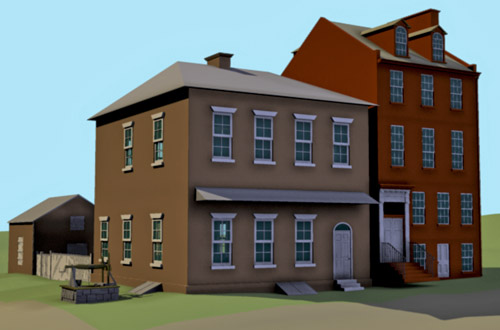
This shows an initial render for the array of directional lights to fill in shadows. Note how there is now soft shadows under the porch roof. The steps and doors look like they are attached to the ground. There is modeling and relief showing the architectural details of the buildings. For the sake of this demo, the fill lights a bit high so we can really see the shadows. In a final render that matches a sunny day, the overall shadows would be deeper. The 7 directional lights' intensities would be set lower.
This render took 20 seconds - even with 7 depthmap lights being calculated. |
 |
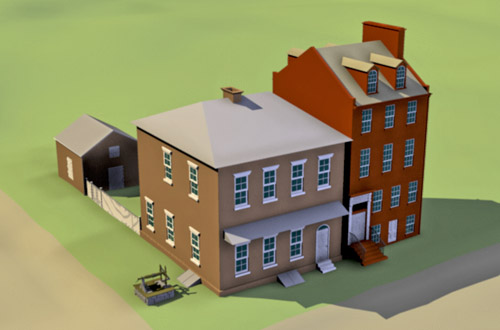
This is a higher angle of the same lighting. Note that now we can begin to see individual shadows from the directional lights being cast on the left side of the buildings. Also there is no shadows on the sunny side of the building to attach it to the ground.
|
 |
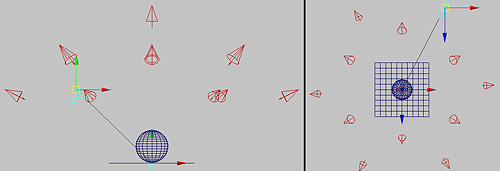
Another system for direct lighting is to use a rig of spotlights coming in from all angles of the sky. There are numerous such rigs available online for free download. The most notable is called GI Joe and is available from CreativeCrash.com. GI Joe has expressions and mel scripts built in so you can quickly adjust all the attributes of the lights. This is huge! All the lights point to the center. A typical rig contains 10-30 spotlights. |
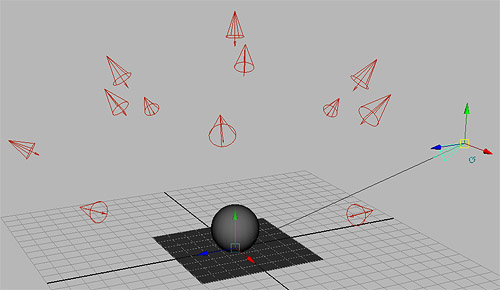 |
A side and top view to show the layout of this group of 13 spotlights. Once arranged the spotlights are grouped together and the group's pivot point is positioned in the center where all the lights meet. This allows you to quickly scale the whole group to match any size needed. |
 |
| This is an example render of the above rig. The shadows almost look like an ambient occlusion render. This effect really helps to darken areas in cracks and between objects. | 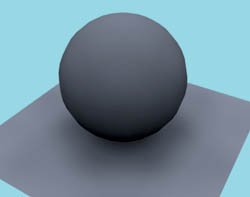 |
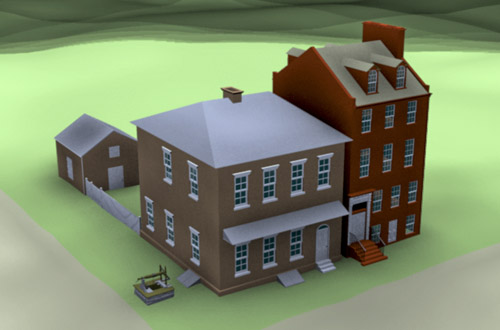
This is the scene lit only with the above spotlight rig. Note there are now very good shadows all around the base of the buildings. There is a more natural pooling of light. It looks like a cloudy day. The down side is that the ground plane is so large that the spotlights are not covering the whole scene. They could be scaled back, but that would cause the depthmap shadow maps to use a higher resolution. This would be a good example of when the foreground needs to be separated from the background. Also, because of the angle and the background, this render is taking about 4 minutes. |
 |
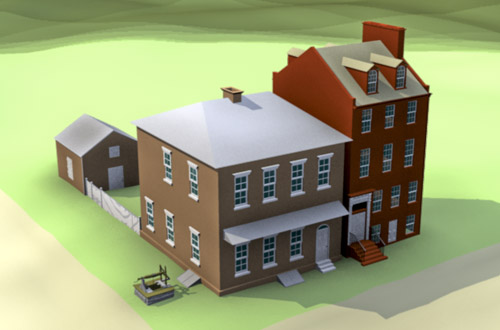
Same render but with the Sun or Key light back on. Note that even on the sunny side of the buildings there is a welling of shadow where the building meets the ground.
|
 |
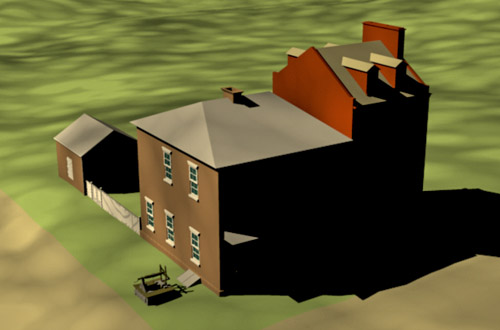
Another typical technique is to map noise, fractals, or gobo images to the main light. This can give some mottling across the whole image. This is an extreme example to help the animator adjust the settings. The fill lights were temporarily turned off so the render only took 3 seconds as the settings were tweaked. Use Color Gain and Offset to control the color and contrast of the image. NOTE that to do this effect you have to use a spotlight. So in this case we had to turn our sun directional light into a spotlight. The angle to the buildings were kept the same, so the shadow is the same, but the light had to be translated very far away from the buildings. |
 |
| When you want to have a spotlight mimic the parallel rays of the sun or of a directional light, you need to make a small cone angle. This diagram gives a good visual clue as to why this needs to be done. Imagine the shadow cast from each of the spots. The one with the small cone angle would be much sharper than the one with a wide angle. | 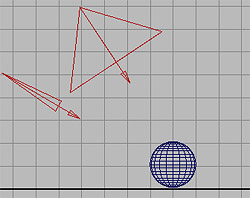 |
An early test of the sun light with noise mapped to it along with the fill shadows from the spotlight rig.
|
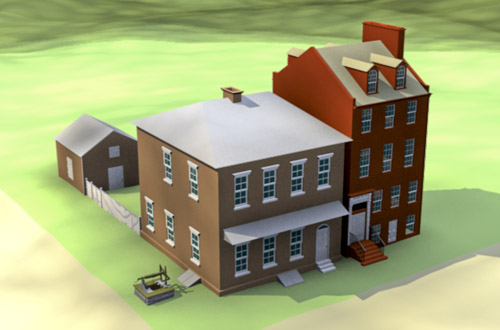 |
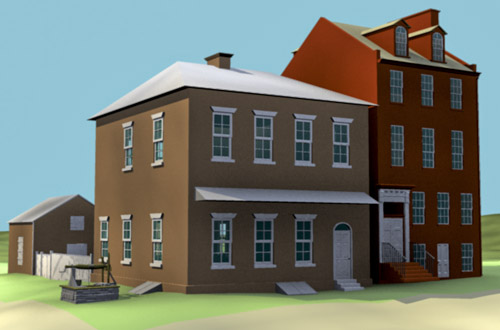
This is the same light setup as above, but we are back to the lower angle. Note the nice mottling of light across the top of the red wall and roofs. This is caused by the mapping of noise to the sunlight. The shadows are looking better. It might be time to turn on the textures and start some final tweaking.
This render took less than 30 seconds (adding textures will dramatically increase the time). |
 |
UMBC Department of Visual Arts, Advanced Maya Courses, Dan Bailey