Adding in Objects to a QTVR using Photoshop and filters
This page is designed as a supplement to lectures. It is not intended to be a stand alone tutorial.
This is a quick example of how to use Photoshop to add in objects to a QTVR. This is appropriate in making presentations for site-specific sculptures.
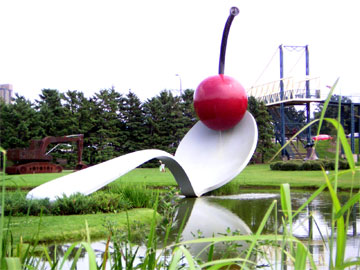
I found two quick, low resolution jpgs of Claes Oldenburg sculptures on the web.
 |
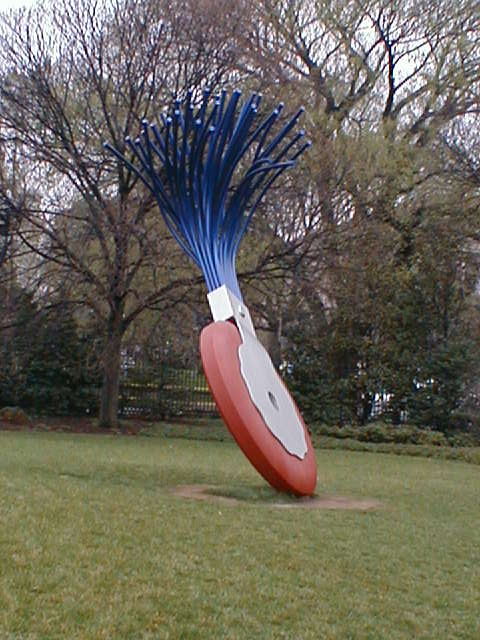 |
These were quickly cut-out, feathered by 2 pixels, and pasted into a finished panorama of the Administration Building. Levels and Color Balance were adjusted so that sculptures matched the panorama. Fake shadows were added by "burning" in shadow detail. Part of the spoon was cut away so that the dog's head was in front of it. The layers were flattened and a standard Photoshop Filter was used to blend the objects into the scene. To create a look that perhaps resembles a landscape architect's drawing style, Filters>Brush Strokes>Ink Outlines was used with the options tweaked.
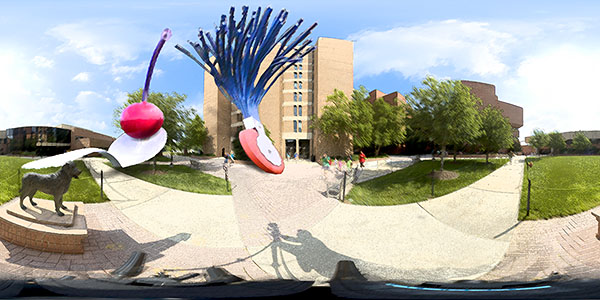
Note that distortion increases as a panorama approaches the North and South Poles. In a quick attempt to match that, the top of both sculptures were stretched out horizontally using Photoshop's "Edit>Transform>Distort tool. This was done before any blending or flattening. If you carefully look at the QTVR, you will note that the very top of the eraser brush needs to be REALLY stretched out since it is so close to the North Pole.
Converting a panorama
back into a QTVR is easy. Launch Stitcher (you do not need to open or load
any files) and go to the Tool Menu and select Panorama Conversion. In that
menu you are able to select the panorama you want to convert, adjust its
size and compression settings, and where you want to export it to.