Ramp and Toon Shaders
This page is designed as a supplement to lectures. It is not intended to be a stand alone tutorial.
The toon shaders built within Maya take great advantage of the ramp shader. Becoming comfortable with the ramp shader is essential for creating your own unique rendering looks. Ramp shaders work both in Maya and Mental Ray renderers.
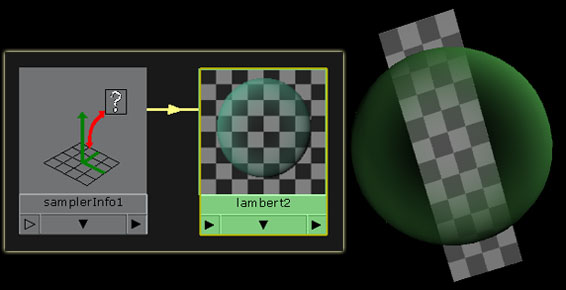
Ramp and Toon Shaders effects many times depend on the angle of the objects face normals in relation to a camera or light. In this image, a face normal that is angled straight at the camera could be rendered differently than one that is angled 90 degrees to it. These 90 degree normals form the outline of an object. The rendering program first has to determine what angle the face normal is to a camera or light. In Maya this is done with a sampler node. |
 |
In this example, a SamplerInfo node has been set to sample the face normal to the camera and this has been connected to the transparency channel of a shader. The resulting effect is that an object gets more transparent in the center and opaque at the edges. This forms the basis of ramp and toon shaders, though it has all been incorporated within the ready make shaders. |
 |
The Ramp Shader comes with many usable and effective Presets. Play with these. See their effects and look at how the have been setup. This can teach you much about using the Shaders. For Color, it defaults to a map of just gray. You can click within the ramp box, move the slider, select colors and create the colors you need. You select different interpolations between each color. "None" can be very useful. The Color Input drop down is very powerful. You can pick between Light Angle, Camera Angle, and Brightness. This changes how the ramp colors are mapped to the objects. |
 |
| Instead of just using colors to create a ramp, you can map textures to areas of the ramp. |  |
In this example I will be mapping 3 pencil rubbing textures to create a hand-sketched type of look: a light yellow for bright areas; a medium gray for middle areas; and a dense blue for dark areas. This can be mapped normally to objects and the sliders can be adjusted to get the range of shading you want. |
 |
A more interesting effect is to project the textures onto the objects, as opposed to using the object's existing UV mapping. Within the Create Render Node dialogue box, select with "Projection" as opposed to "Normal." Once the node is created there are many choices for how to project the textures into the scene. In this example, I am using a camera. The texture will be projected from a camera's perspective. This can be the camera we are rendering through, or a separate camera. |
 |
| This is the Ramp Shader with two of the three pencil textures attached. |  |
| Final Result. |  |